Vue 3 的 8 种和 Vue 2 的 12 种组件通信,值得收藏
“Vue 3 的 8 种、Vue 2 的 12 种”是原作者的经验分类,不是 Vue 官方规定的通信方式数量。原文把 API、机制和第三方库混在一起计数;本文保留这个标题和文章结构,同时按使用场景重新整理。
前半部分以 Vue 3.5 为当前写法,后半部分保留 Vue 2.7 的历史 API 和迁移参考。Vue 2.7.16 已是 Vue 2 最终版本并且已经 EOL,新项目应优先使用 Vue 3。
Vue 3 组件通信方式
原文列出的 8 项可以归纳为:
- props:父组件传给子组件;
- emits /
$emit:子组件通知父组件; - 模板 ref /
defineExpose:必要时的命令式访问; $attrs:透传未声明的属性和事件监听器;v-model/defineModel:约定式双向模型;- provide / inject:跨层级依赖注入;
- Pinia/Vuex:跨组件共享状态;
- mitt 等外部 emitter:确有事件总线需求时使用。
这不是官方固定清单。父子关系优先使用 props/emits;深层依赖优先考虑 provide/inject;多个页面共享状态再考虑 Pinia;不要为了凑通信方式数量而滥用 $parent、全局 EventBus 或组件 ref。
一、props:父组件传给子组件
<script setup> 写法
父组件:
<!-- Parent.vue -->
<script setup lang="ts">
import { ref } from 'vue'
import Child from './Child.vue'

const msg1 = ref('这是传给子组件的信息 1')
const msg2 = ref('这是传给子组件的信息 2')
</script>

<template>
  <Child :msg1="msg1" :msg2="msg2" />
</template>
子组件:
<!-- Child.vue -->
<script setup lang="ts">
const props = defineProps<{
  msg1: string
  msg2: string
}>()

console.log(props.msg1, props.msg2)
</script>
defineProps 是 <script setup> 编译器宏,不需要从 vue 导入。也可以使用运行时声明:
const props = defineProps({
  msg1: String,
  msg2: {
    type: String,
    default: '',
  },
})
普通 setup() 写法
export default {
  props: {
    msg: String,
  },
  setup(props) {
    console.log(props.msg)
  },
}
父组件使用 Options API 的 data,还是使用 <script setup> 的顶层变量,并不决定子组件能不能收到 props。只要父模板使用 :msg="value" 传入,子组件声明了 msg,它就可以在 props 中得到该值。
Props 是单向下行绑定,子组件不应直接修改 prop:
const props = defineProps<{ title: string }>()

// ❌ props.title = 'new title'
如果需要改变父状态,应由子组件 emit 事件,让父组件完成修改;如果只是根据 prop 派生值,可以使用 computed。
二、emits / $emit:子组件通知父组件
<script setup> 写法
<!-- Child.vue -->
<script setup lang="ts">
const emit = defineEmits<{
  'my-click': [message: string]
}>()

function handleClick() {
  emit('my-click', '这是子组件发送的信息')
}
</script>

<template>
  <button @click="handleClick">发送</button>
</template>
父组件监听:
<Child @my-click="handleMyClick" />
function handleMyClick(message: string) {
  console.log(message)
}
也可以使用简单数组声明:
const emit = defineEmits(['my-click'])
普通 setup() 使用第二个参数中的 emit:
export default {
  emits: ['my-click'],
  setup(_props, { emit }) {
    emit('my-click', 'message')
  },
}
Vue 3 组件事件不会像原生 DOM 事件那样冒泡,只能由直接父组件监听。事件名建议在模板中使用 kebab-case,并显式声明 emits,以便文档、类型检查和 $attrs fallthrough 行为更清晰。
三、模板 ref 与 defineExpose
组件 ref 是命令式通信方式,适合聚焦输入、调用公开方法等少量场景,不应代替普通 props/emits。
子组件:
<!-- Child.vue -->
<script setup lang="ts">
const childName = 'Child'

function focusInput() {
  // ...
}

defineExpose({
  childName,
  focusInput,
})
</script>
父组件在 Vue 3.5+ 可以使用 useTemplateRef:
<script setup lang="ts">
import { onMounted, useTemplateRef } from 'vue'
import Child from './Child.vue'

const child = useTemplateRef('child')

onMounted(() => {
  child.value?.focusInput()
})
</script>

<template>
  <Child ref="child" />
</template>
兼容更早 Vue 3 版本时,可以使用普通 ref:
import { ref, onMounted } from 'vue'

const child = ref<InstanceType<typeof Child> | null>(null)
onMounted(() => child.value?.focusInput())
<script setup> 组件默认不会把所有内部绑定暴露给父组件;只有 defineExpose() 中的属性属于公开接口。模板 ref 只有在挂载后才可安全读取,并且可能为 null。
普通 setup() 中对应的是 setup context 的 expose:
export default {
  setup(_props, { expose }) {
    expose({
      focusInput() {},
    })
  },
}
原文的 useContext() 已在 Vue 3.1 废弃并在 3.2 移除,不能继续使用。
四、$attrs:透传属性和监听器
Vue 3 的 fallthrough attrs 是没有声明为 props 或 emits 的所有属性和事件监听器,包括:
class、style、id等普通属性;- 未声明的
@click等监听器,在 JavaScript 中通常表现为$attrs.onClick。
单根组件默认会把 attrs 透传到根元素:
<!-- MyButton.vue -->
<template>
  <button>Click</button>
</template>
<MyButton class="large" id="save" @click="save" />
如果组件有多根节点,Vue 无法自动判断 attrs 应该放到哪里,需要显式绑定:
<template>
  <header>Header</header>
  <main v-bind="$attrs">Content</main>
</template>
如果希望手动决定透传位置:
<script setup>
defineOptions({ inheritAttrs: false })
</script>

<template>
  <div class="wrapper">
    <button v-bind="$attrs">Click</button>
  </div>
</template>
在脚本中读取 attrs:
<script setup>
import { useAttrs } from 'vue'

const attrs = useAttrs()
console.log(attrs)
</script>
attrs 会反映最新值,但本身不是响应式对象,不能用 watch 监听它的变化;需要响应式通信时应声明明确的 prop。
五、v-model 与 defineModel
Vue 3.4+ 推荐写法
普通 v-model 对应 modelValue prop 和 update:modelValue 事件,Vue 3.4+ 推荐使用 defineModel():
<!-- CustomInput.vue -->
<script setup>
const model = defineModel()
</script>

<template>
  <input v-model="model" />
</template>
父组件:
<CustomInput v-model="searchText" />
带参数的 model:
<!-- Parent.vue -->
<UserEditor v-model:item-key="selectedKey" v-model:value="value" />
<!-- UserEditor.vue -->
<script setup>
const itemKey = defineModel('itemKey')
const value = defineModel('value')
</script>

<template>
  <input v-model="itemKey" />
  <input v-model="value" />
</template>
这里使用 itemKey,而不是 key。key 是 Vue VNode 的保留属性,不适合作为业务 model 名。
Vue 3.3 及更早版本的展开写法
<script setup>
const props = defineProps({
  itemKey: String,
  value: String,
})

const emit = defineEmits([
  'update:itemKey',
  'update:value',
])

function updateItemKey(event) {
  emit('update:itemKey', event.target.value)
}
</script>
不能只声明 defineEmits(['itemKey', 'value']),因为父组件 v-model:item-key 需要的是 update:itemKey 事件。defineModel 是编译器宏的便利封装,本质仍然是 prop + update 事件。
六、provide / inject:跨层级依赖注入
父组件可以向所有后代提供依赖,后代不需要逐层传 props:
// keys.ts
import type { InjectionKey, Ref } from 'vue'

export interface LocationContext {
  location: Readonly<Ref<string>>
  updateLocation: (value: string) => void
}

export const locationKey: InjectionKey<LocationContext> = Symbol('location')
<!-- Provider.vue -->
<script setup lang="ts">
import { provide, readonly, ref } from 'vue'
import { locationKey } from './keys'

const location = ref('North Pole')

function updateLocation(value: string) {
  location.value = value
}

provide(locationKey, {
  location: readonly(location),
  updateLocation,
})
</script>
<!-- DeepChild.vue -->
<script setup lang="ts">
import { inject } from 'vue'
import { locationKey } from './keys'

const provided = inject(locationKey)
if (!provided) {
  throw new Error('location was not provided')
}

const { location, updateLocation } = provided
</script>

<template>
  <button @click="updateLocation('South Pole')">
    {{ location }}
  </button>
</template>
要点:
- 提供
ref、reactive或 computed 才能保留响应式连接; - 推荐由 provider 持有修改逻辑,inject 方调用更新函数;
- 可以用
readonly()防止后代直接修改状态; - 组件库或大型项目优先用 Symbol injection key,避免字符串冲突;
- provide/inject 是依赖注入,不是任意组件之间的全局事件总线。
七、Pinia / Vuex:共享状态管理
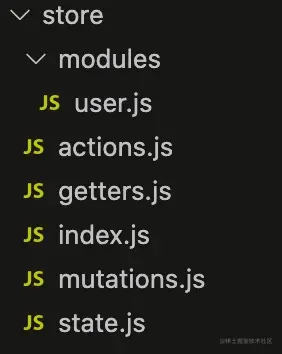
当多个页面或多个不相干组件依赖同一状态时,可以使用 Pinia。Pinia 是 Vue 3 新项目优先考虑的状态管理方案,Vuex 仍可用于旧项目维护。
// stores/counter.ts
import { defineStore } from 'pinia'

export const useCounterStore = defineStore('counter', {
  state: () => ({ count: 0 }),
  getters: {
    double: state => state.count * 2,
  },
  actions: {
    increment() {
      this.count++
    },
  },
})
<script setup>
import { storeToRefs } from 'pinia'
import { useCounterStore } from '@/stores/counter'

const store = useCounterStore()
const { count, double } = storeToRefs(store)
</script>
Vuex 4 的 Vue 3 历史写法:
// store/index.ts
import { createStore } from 'vuex'

export default createStore({
  state: () => ({ count: 1 }),
  getters: {
    count: state => state.count,
  },
  mutations: {
    add(state) {
      state.count++
    },
  },
})
import { createApp } from 'vue'
import App from './App.vue'
import store from './store'

createApp(App).use(store).mount('#app')
Vuex 3 对应 Vue 2,Vuex 4 对应 Vue 3。共享状态管理不应代替每一个父子事件;局部通信仍优先使用 props/emits。
八、mitt 等外部 emitter
Vue 3 移除了 Vue 2 实例上的 $on、$off、$once,但仍可以使用 mitt 等独立事件库。它适合确实需要跨组件树广播事件的场景,不应默认替代 props/emits 或 Pinia。
pnpm add mitt
// emitter.ts
import mitt from 'mitt'

export type Events = {
  'handle-change': string
}

const emitter = mitt<Events>()
export default emitter
发送方:
<script setup lang="ts">
import emitter from './emitter'

function handleClick() {
  emitter.emit('handle-change', 'new value')
}
</script>

<template>
  <button @click="handleClick">发送</button>
</template>
接收方必须保存同一个 handler 引用,并在卸载时精确移除:
<script setup lang="ts">
import { onMounted, onUnmounted } from 'vue'
import emitter from './emitter'

function handleChange(value: string) {
  console.log(value)
}

onMounted(() => emitter.on('handle-change', handleChange))
onUnmounted(() => emitter.off('handle-change', handleChange))
</script>
不要写成 import mitt from 'mitt'; const mitt = mitt(),这会造成导入绑定和局部变量同名。也不要只调用 off('handle-change'),因为它可能移除其他组件注册的同类型监听器。
在 SSR/Nuxt 中还要避免无意间使用跨请求共享的模块级可变 emitter;需要请求隔离时,应按 app/request 作用域创建并通过插件或依赖注入提供。
Vue 2.7 组件通信方式(历史参考)
原文列出的 12 项可以保留为 Vue 2 时代的经验分类:
- props;
$emit/v-on;.sync;v-model;ref;$attrs/$listeners;$children/$parent;- provide / inject;
- EventBus;
- Vuex;
$root;- slot。
其中 $listeners、$children、Vue 实例 EventBus 和 .sync 都不是 Vue 3 的当前 API。保留它们的意义在于维护 Vue 2.7 项目和理解迁移差异。
1. Vue 2 props
<!-- Parent.vue -->
<template>
  <Child :msg="msg" />
</template>

<script>
export default {
  data() {
    return {
      msg: '来自父组件',
    }
  },
}
</script>
// Child.vue
export default {
  props: {
    msg: {
      type: String,
      default: '',
    },
  },
  mounted() {
    console.log(this.msg)
  },
}
Props 是单向下行,子组件不能直接修改。若要修改,应通过 $emit 通知父组件;若只是根据 prop 派生值,可以使用 computed。
2. Vue 2 .sync
.sync 是 update:propName 事件的语法糖,不是子组件直接修改父组件数据:
<!-- Parent.vue -->
<Child :page.sync="page" />
等价于:
<Child
  :page="page"
  @update:page="page = $event"
/>
// Child.vue
export default {
  props: ['page'],
  computed: {
    currentPage: {
      get() {
        return this.page
      },
      set(value) {
        this.$emit('update:page', value)
      },
    },
  },
}
Vue 3 已移除 .sync,对应写法是 v-model:page。
3. Vue 2 v-model
Vue 2 组件默认把 v-model 编译为 value prop 和 input 事件:
<!-- Parent.vue -->
<Child v-model="value" />
// Child.vue
export default {
  props: ['value'],
  methods: {
    handleChange(event) {
      this.$emit('input', event.target.value)
    },
  },
}
也可以使用 model 选项自定义 prop 和事件:
export default {
  model: {
    prop: 'checked',
    event: 'change',
  },
  props: ['checked'],
}
Vue 3 默认改为 modelValue + update:modelValue,命名模型使用 v-model:arg。
4. Vue 2 $refs
ref 放在普通 DOM 上时得到 DOM 元素,放在子组件上时得到子组件实例:
<Child ref="child" />
export default {
  mounted() {
    const child = this.$refs.child
    child.someMethod()
  },
}
$refs 只有在渲染完成后才填充,并且不是响应式数据。它适合聚焦、测量和调用明确的命令式公开方法,不适合传递普通业务状态。
5. Vue 2 $emit / v-on
子组件:
export default {
  data() {
    return {
      message: '这是子组件的信息',
    }
  },
  methods: {
    handleClick() {
      this.$emit('send-msg', this.message)
    },
  },
}
父组件:
<Child @send-msg="getMessage" />
export default {
  methods: {
    getMessage(message) {
      console.log(message)
    },
  },
}
Vue 2 自定义事件名需要父子完全匹配,不依赖 Vue 3 那样的大小写自动转换;项目中建议统一使用 kebab-case。
6. Vue 2 $attrs / $listeners
Vue 2 的 $attrs 包含父作用域中未被 props 声明的属性,且排除 class 和 style;$listeners 包含父作用域的监听器。它们可以在多层组件中透传:
<!-- Parent.vue -->
<Child name="Vue" title="title" @change="handleChange" />
<!-- Child.vue -->
<template>
  <GrandChild v-bind="$attrs" v-on="$listeners" />
</template>

<script>
export default {
  props: ['name'],
}
</script>
原文中的 $linteners 是拼写错误,应为 $listeners。Vue 3 已移除 $listeners,监听器和 class/style 都进入 $attrs,多根节点需要显式 v-bind="$attrs"。
7. Vue 2 $children / $parent
// Parent.vue
export default {
  mounted() {
    this.$children[0].someMethod()
  },
}
// Child.vue
export default {
  mounted() {
    this.$parent.someMethod()
  },
}
这些属性会造成强耦合:
$children只包含直接子组件,顺序不保证,也不是响应式集合;$parent依赖组件层级结构;- Vue 3 已移除
$children,应改用明确的 props/emits、provide/inject 或模板 ref。
8. Vue 2 provide / inject
// Provider.vue
export default {
  provide() {
    return {
      name: 'Vue',
      someMethod: this.someMethod,
    }
  },
  methods: {
    someMethod() {
      console.log('provided method')
    },
  },
}
// DeepChild.vue
export default {
  inject: ['name', 'someMethod'],
  mounted() {
    console.log(this.name)
    this.someMethod()
  },
}
Vue 2 Options API 的普通 provide/inject 默认不是响应式连接;如果需要共享更新状态,通常应注入可观察对象或方法,并清楚标注版本边界。Vue 3 可以直接 provide ref/reactive/computed,并推荐由 provider 负责修改逻辑。
9. Vue 2 EventBus
Vue 2 时代可以创建一个空 Vue 实例作为事件总线:
// Bus.js
import Vue from 'vue'

export default new Vue()
发送:
import Bus from './Bus'

Bus.$emit('send-msg', 'hello')
接收时应保存 handler,并精确清理:
import Bus from './Bus'

export default {
  mounted() {
    Bus.$on('send-msg', this.handleMessage)
  },
  beforeDestroy() {
    Bus.$off('send-msg', this.handleMessage)
  },
  methods: {
    handleMessage(message) {
      console.log(message)
    },
  },
}
原文的 Bus.$off('sendMsg') 会移除该事件的所有监听器,可能误伤其他组件。Vue 3 已移除实例 $on/$off/$once,新项目可用 mitt,但仍要在卸载时使用相同 handler 调用 off。
10. Vuex(Vue 2 历史方案)
Vue 2 通常使用 Vuex 3:
// store/index.js
import Vue from 'vue'
import Vuex from 'vuex'

Vue.use(Vuex)

export default new Vuex.Store({
  state: {
    count: 0,
  },
  getters: {
    double: state => state.count * 2,
  },
  mutations: {
    add(state) {
      state.count++
    },
  },
})
// main.js
import Vue from 'vue'
import App from './App.vue'
import store from './store'

new Vue({
  store,
  render: h => h(App),
}).$mount('#app')
组件中可使用 this.$store.state、mapGetters 和 mapMutations。Vue 3 对应 Vuex 4,但新项目通常优先 Pinia;Vuex 已进入维护状态。
11. Vue 2 $root
$root 指向 new Vue() 创建的根实例,而不一定就是 App.vue 组件实例:
this.$root
小 demo 中可以使用,但大型项目不应通过 $root 隐式共享任意数据和方法,优先使用 Pinia、props/emits 或 provide/inject。
12. Vue 2 slot 和 scoped slot
普通 slot 是父组件提供模板内容,子组件通过 <slot> 渲染:
<!-- Child.vue -->
<template>
  <button class="fancy-button">
    <slot>默认文本</slot>
  </button>
</template>
<!-- Parent.vue -->
<Child>保存</Child>
如果需要把子组件的数据传给父组件提供的 slot 内容,则使用 scoped slot:
<!-- Child.vue -->
<template>
  <slot :user="user" />
</template>

<script>
export default {
  data() {
    return {
      user: { name: 'Vue' },
    }
  },
}
</script>
<!-- Parent.vue,Vue 2.6/2.7 推荐 v-slot -->
<Child v-slot="slotProps">
  {{ slotProps.user.name }}
</Child>
Vue 3 的 slots 语义基本延续了 scoped slots,但使用 <template #name> 和 v-slot 的写法更加统一。
迁移对照表
| Vue 2.7 历史写法 | Vue 3 当前写法 |
|---|---|
props + $emit | props + defineEmits / $emit |
.sync | v-model:prop |
value + input 组件 v-model | modelValue + update:modelValue,或 defineModel |
$attrs + $listeners | $attrs 同时包含 fallthrough 属性和监听器 |
$children | 模板 ref、明确公开接口或 provide/inject |
| Vue 实例 EventBus | mitt 等外部 emitter,精确清理 handler |
| Vuex 3 | Pinia;Vuex 4 仅作 Vue 3 旧项目兼容 |
beforeDestroy / destroyed | beforeUnmount / unmounted |
总结
- 父子组件优先使用 props 和 emits,不要直接修改 props。
- 组件双向模型在 Vue 3.4+ 优先使用
defineModel();多个模型使用不同且非保留的名称。 defineExpose与模板 ref 只公开必要的命令式能力。- Vue 3
$attrs包含未声明 props/emits 的属性、class、style和事件监听器。 - provide/inject 适合依赖注入,Pinia 适合跨页面共享状态,mitt 只适合明确的事件广播需求。
- Vue 2 的
.sync、$listeners、$children和实例 EventBus 应标记为历史 API。 - Vue 2.7 只适合旧项目维护和迁移参考,新项目以 Vue 3.5 为准。
官方参考
- Vue 3 Props
- Vue 3 Component Events
- Vue 3 Component v-model
- Vue 3 Template Refs
- Vue 3 Fallthrough Attributes
- Vue 3 Provide / Inject
- Vue 3 Slots
- Vue 3 State Management
- Vue 3 Events API 迁移
- Vue 3
$listeners迁移 - Vue 3
$attrs迁移 - Vue 3 v-model 迁移
- Vue 2 组件基础(历史)
- Vue 2 自定义事件(历史)
- Vue 2 组件边界情况(历史)
- Vue 2 插槽(历史)
- Pinia
- mitt
原文出处
作者:沐华
原文链接:https://juejin.cn/post/6999687348120190983
来源:稀土掘金。著作权归作者所有,商业转载请联系作者获得授权,非商业转载请注明出处。